
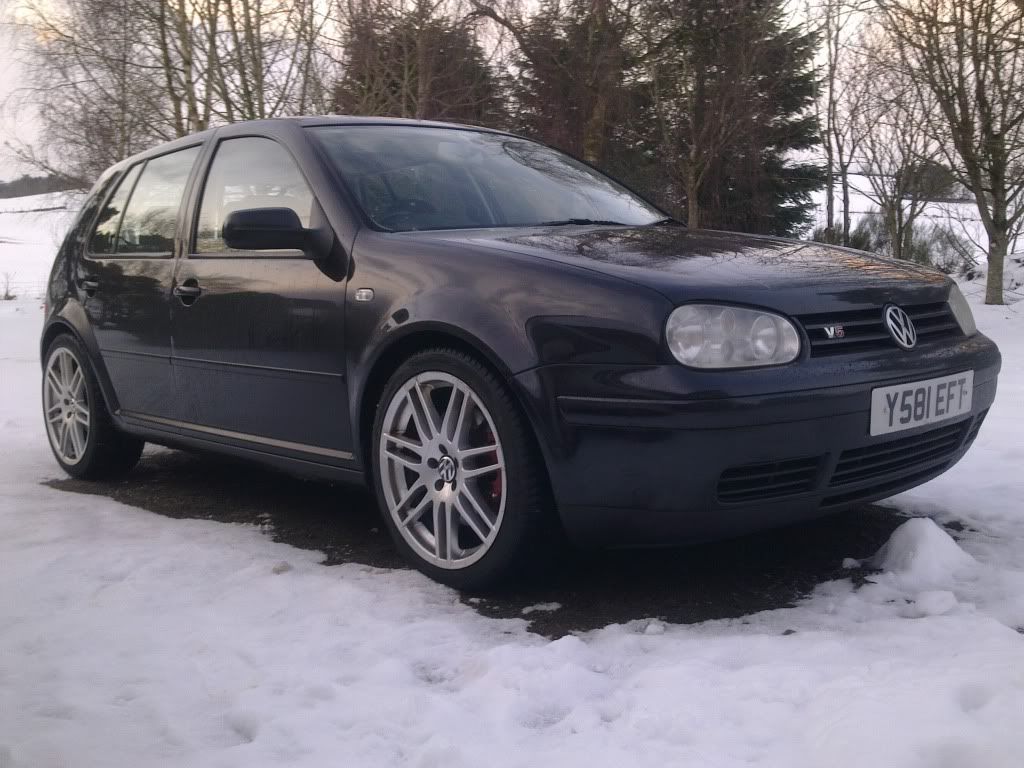
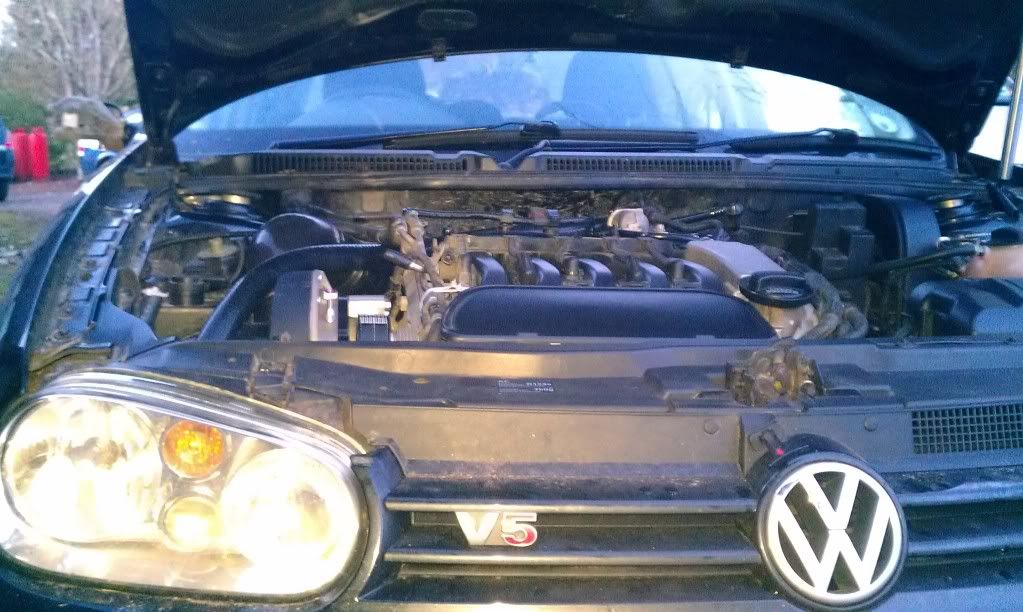
inzors charged V5. stripped for re-build and forging
golfv5.com :: General :: Members Rides
Page 1 of 3 • 1, 2, 3 ![]()

inzors charged V5. stripped for re-build and forging
![]() by inzor Wed Feb 19, 2014 7:13 pm
by inzor Wed Feb 19, 2014 7:13 pm
Last edited by inzor on Wed Oct 29, 2014 12:36 pm; edited 2 times in total
inzor- Posts : 63
Join date : 2014-02-17
Re: inzors charged V5. stripped for re-build and forging
![]() by inzor Wed Feb 19, 2014 7:29 pm
by inzor Wed Feb 19, 2014 7:29 pm
lowered 30mm
mapped
powerflow exhaust
pipercross pannel filter
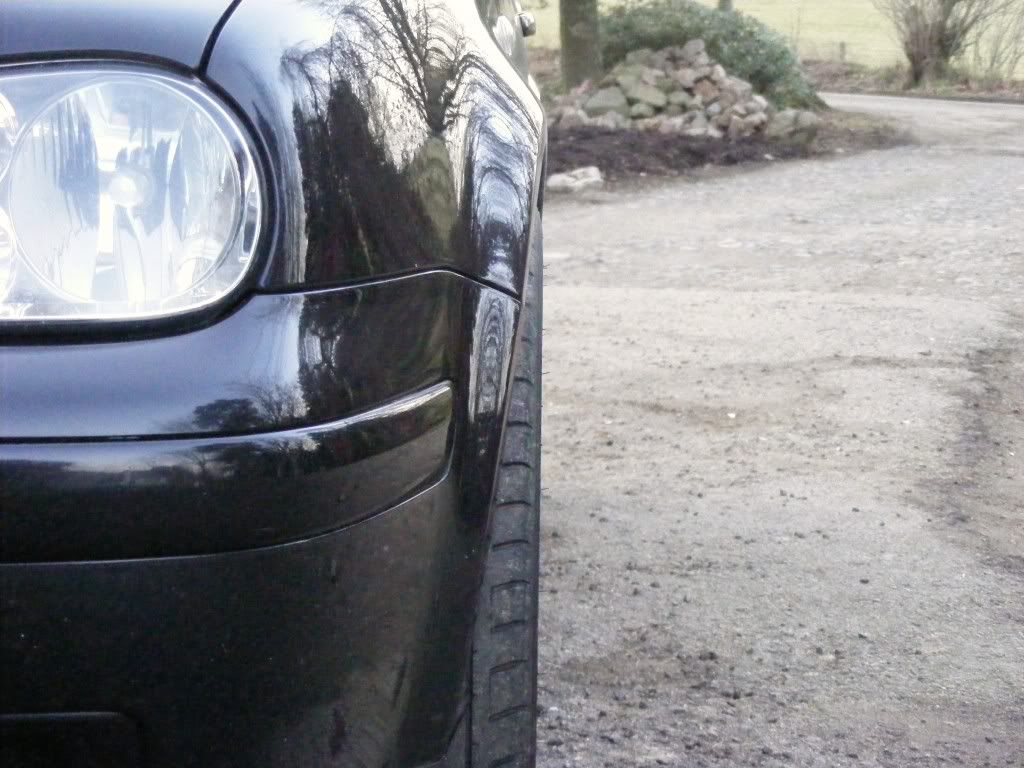
audi rs4 reps.
soon after iit looked like this:
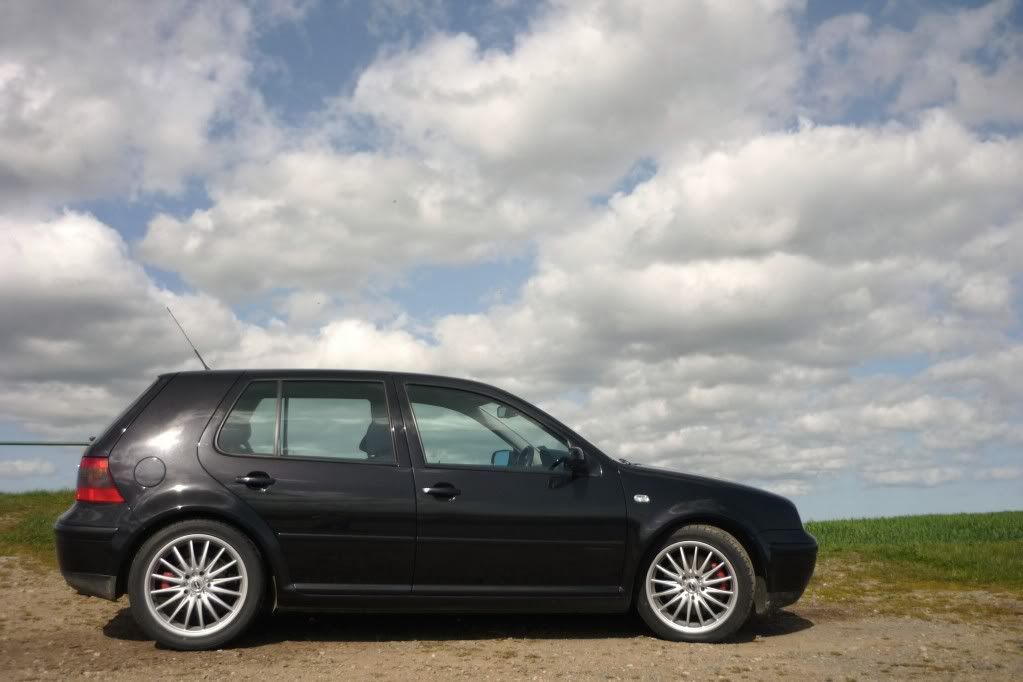
a pothole took out one of the RS4s so sold them and got some team dynamics wheels brand new with toyo proxes on them. almost 2kg lighter per corner, ride was better and grip was amazing. so i was happy but dont think it looks as good.
soon after came the whiteline adjustable rear ARB. transformed the handling to say the least! then after a new sump i got an alloy sump guard. only sits 15mm lower than the sump but scrapes on everything, so the sump must of got some close calls before it went.
spaced the wheels out soon after that.
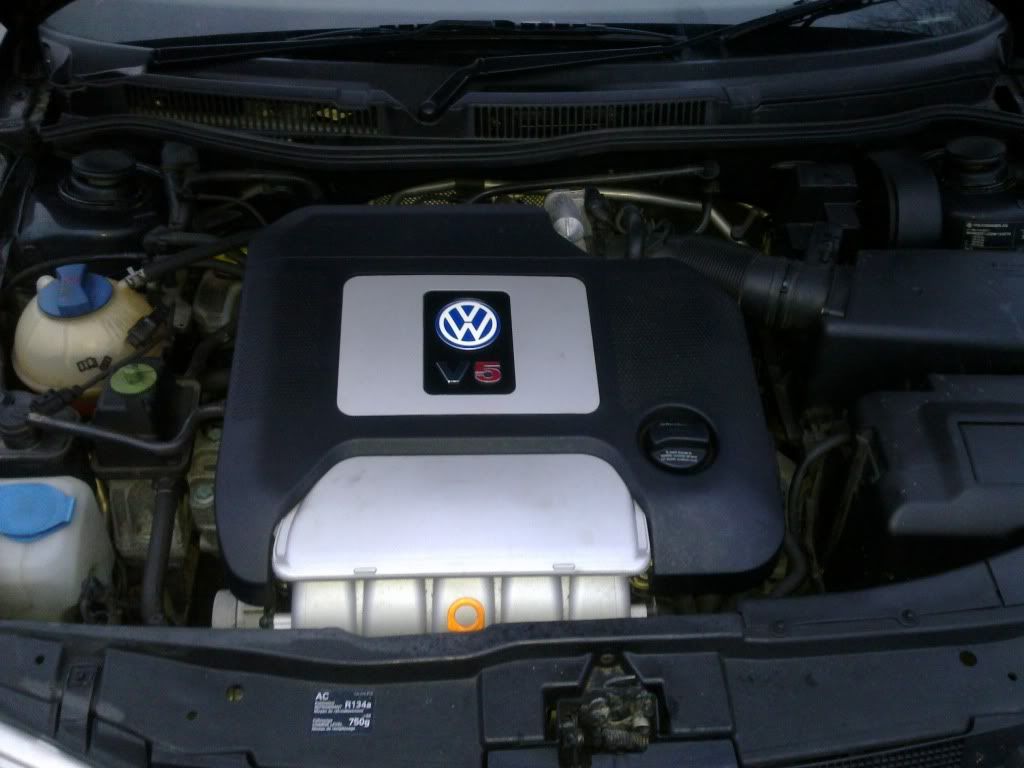
then the fun started
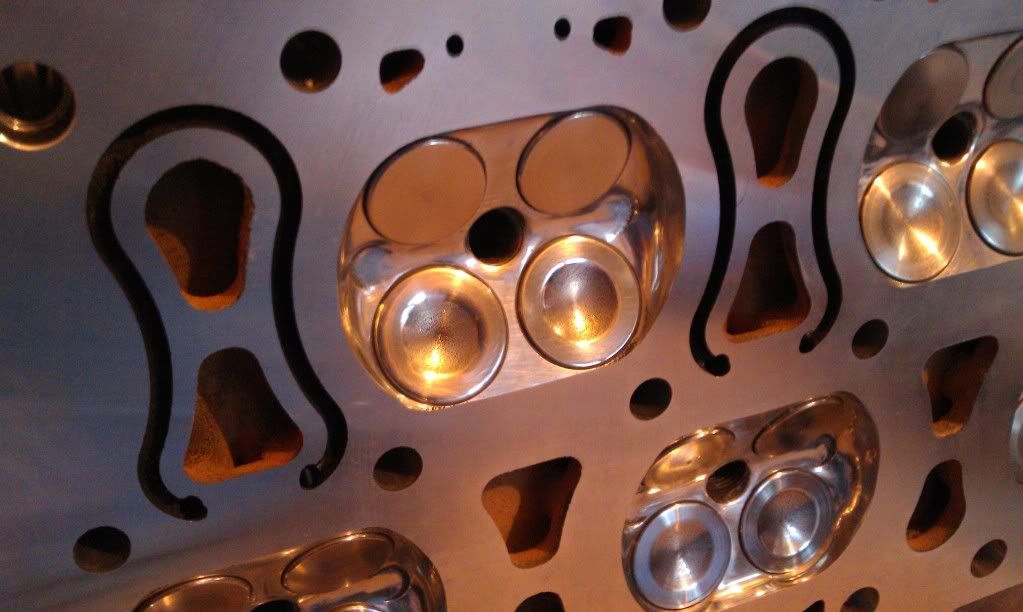
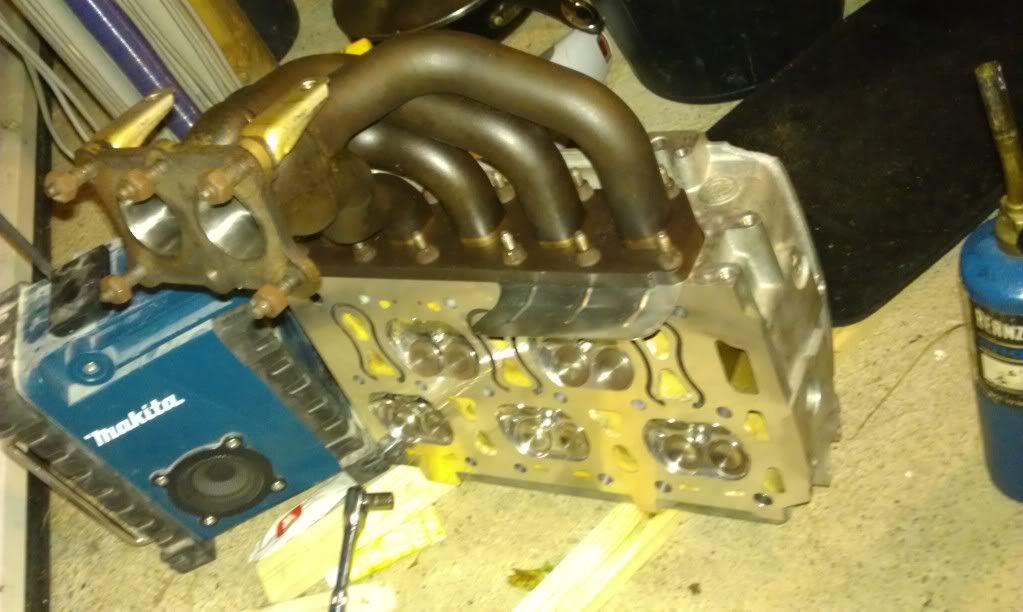
a head was bought then sent away next day for porting and polishing.
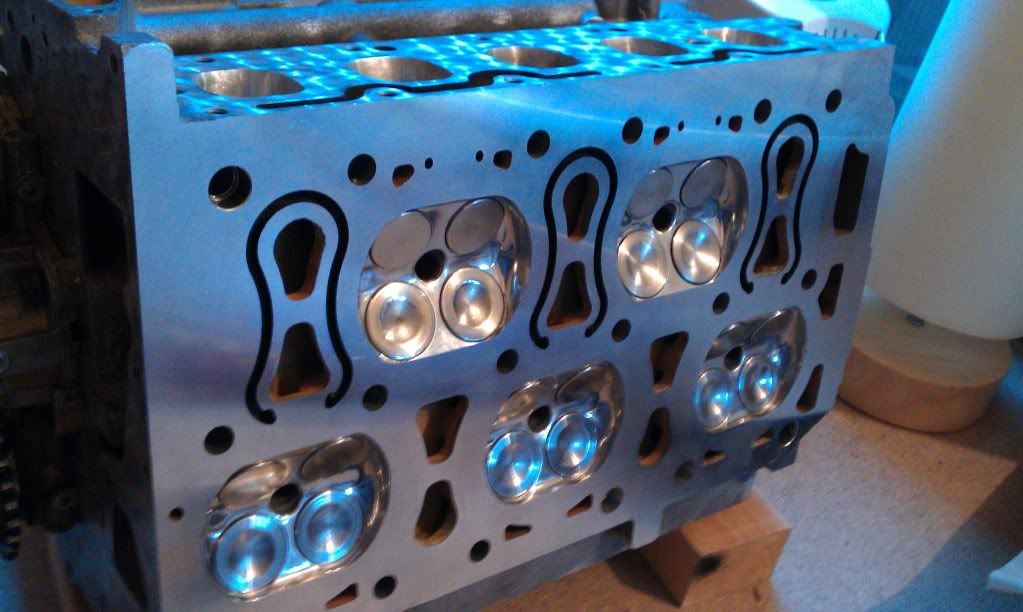
sat around for ages holding paper down and looking good till i decided to fit it myself, no garage wanted the job!
inzor- Posts : 63
Join date : 2014-02-17
Re: inzors charged V5. stripped for re-build and forging
![]() by inzor Wed Feb 19, 2014 7:32 pm
by inzor Wed Feb 19, 2014 7:32 pm
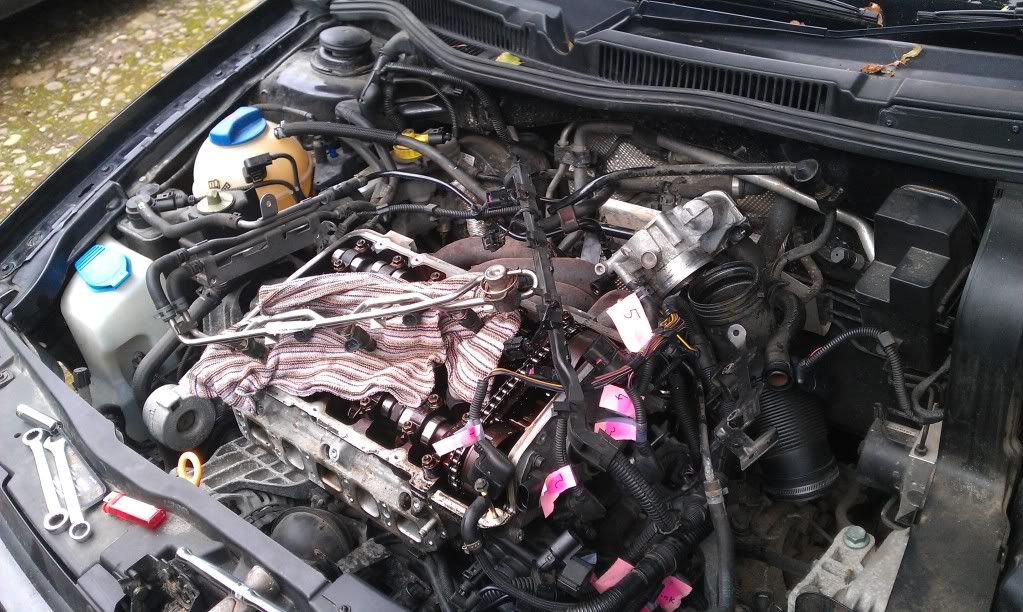


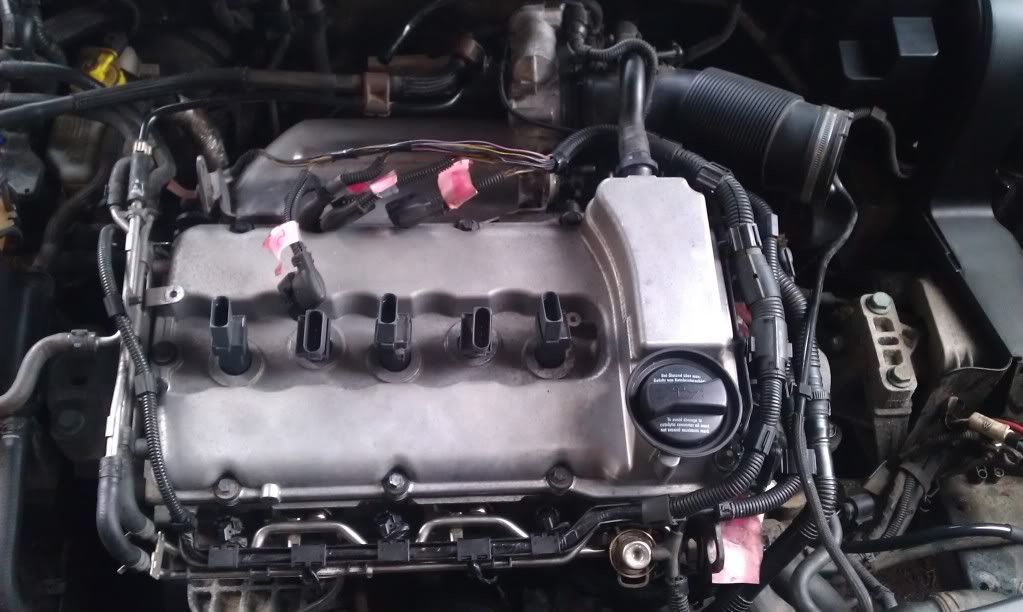
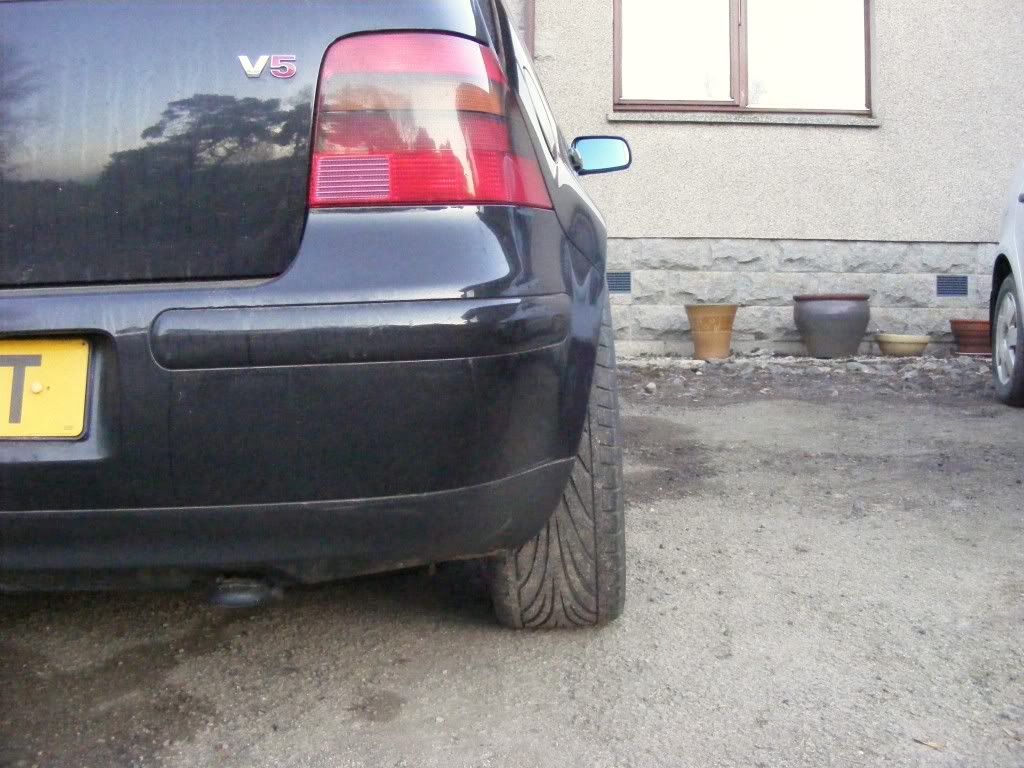
after the exhaust was on it sounded normal again, no fault codes comming up or anything so must of got the timing pretty good.
took it for a drive.

nothing much since then ( a month ago). still havent had it dyno'd, place in aberdeen wants £90 for 2 runs, only 3x more than places in england/south scotland.
inzor- Posts : 63
Join date : 2014-02-17
Re: inzors charged V5. stripped for re-build and forging
![]() by inzor Wed Feb 19, 2014 7:39 pm
by inzor Wed Feb 19, 2014 7:39 pm
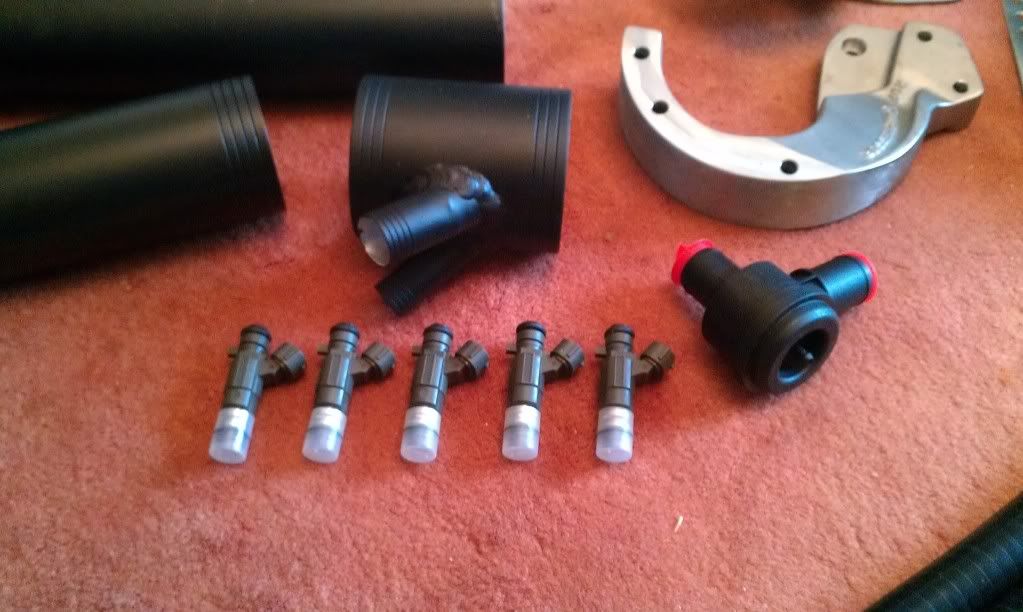
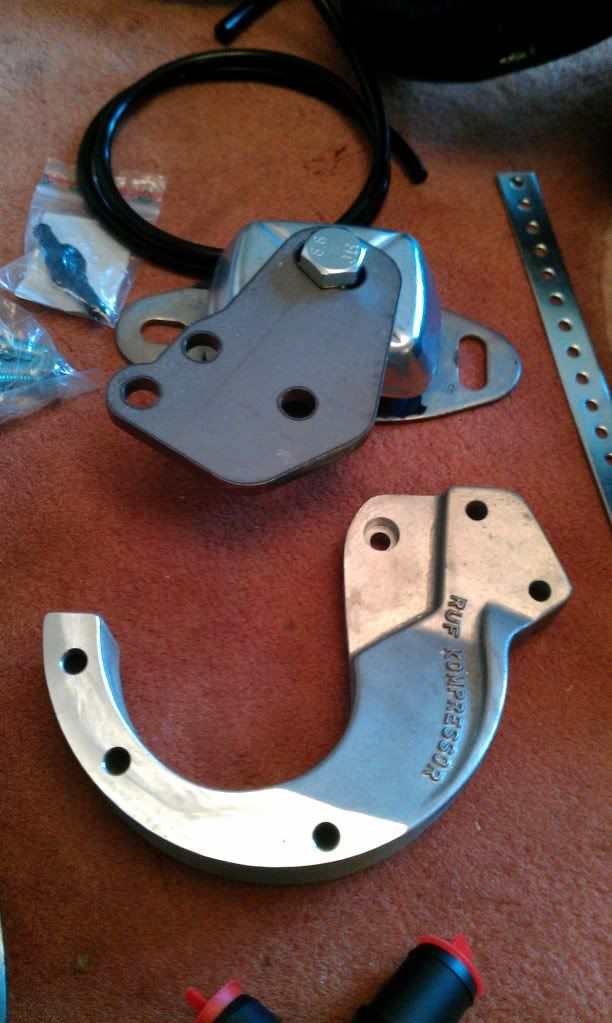
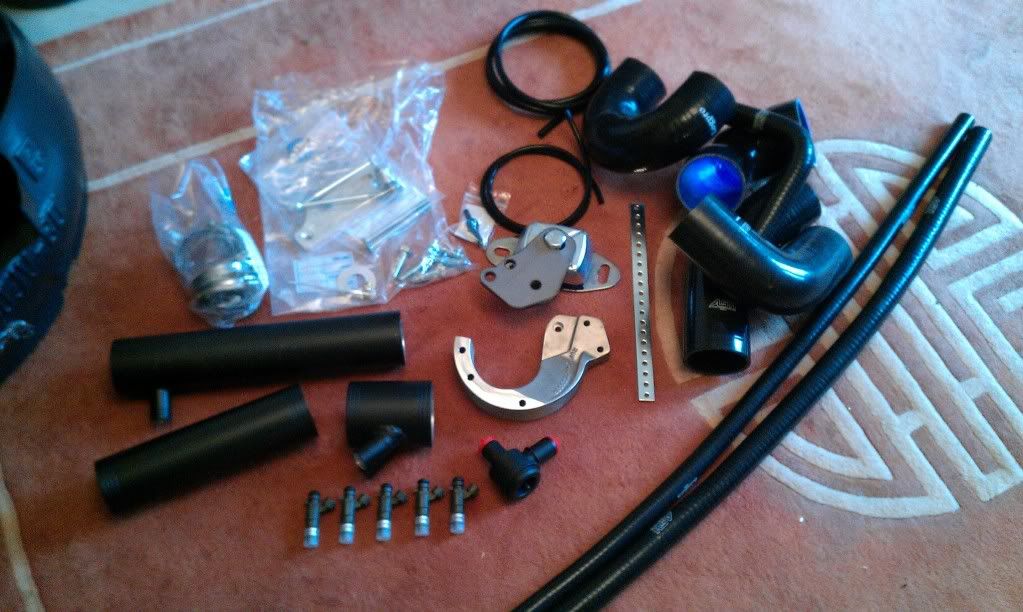
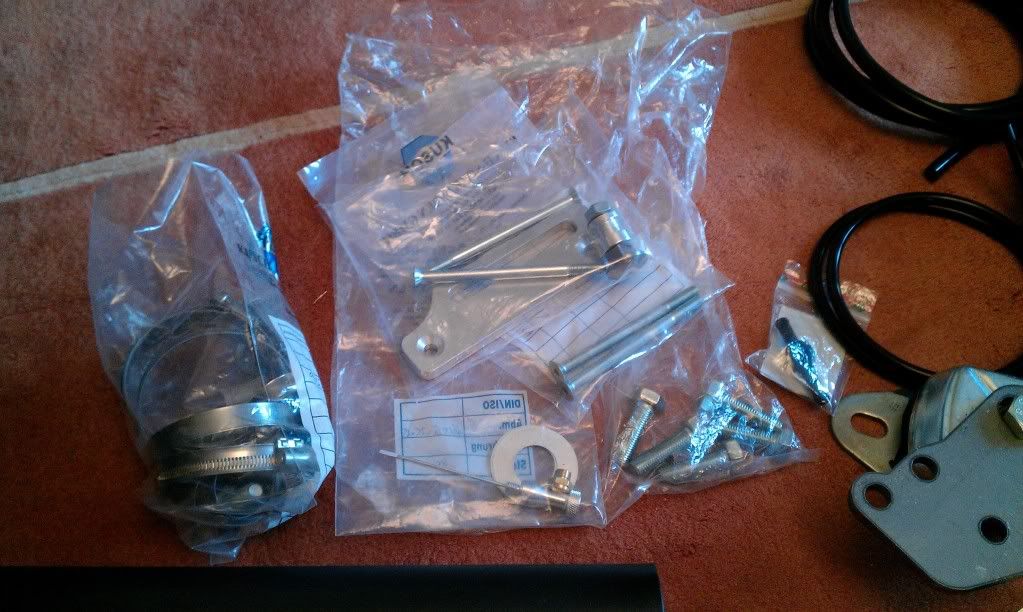
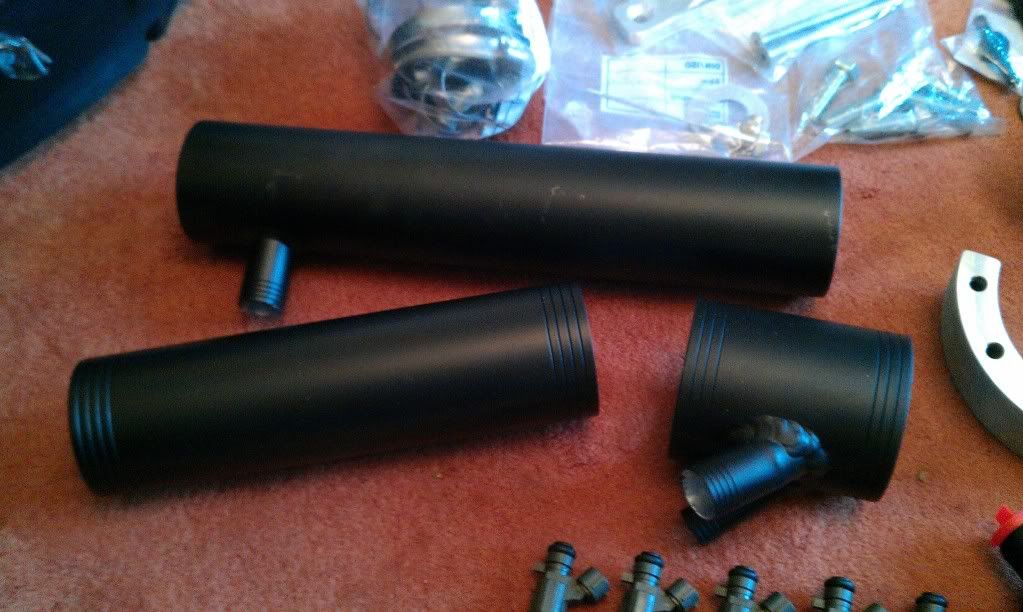
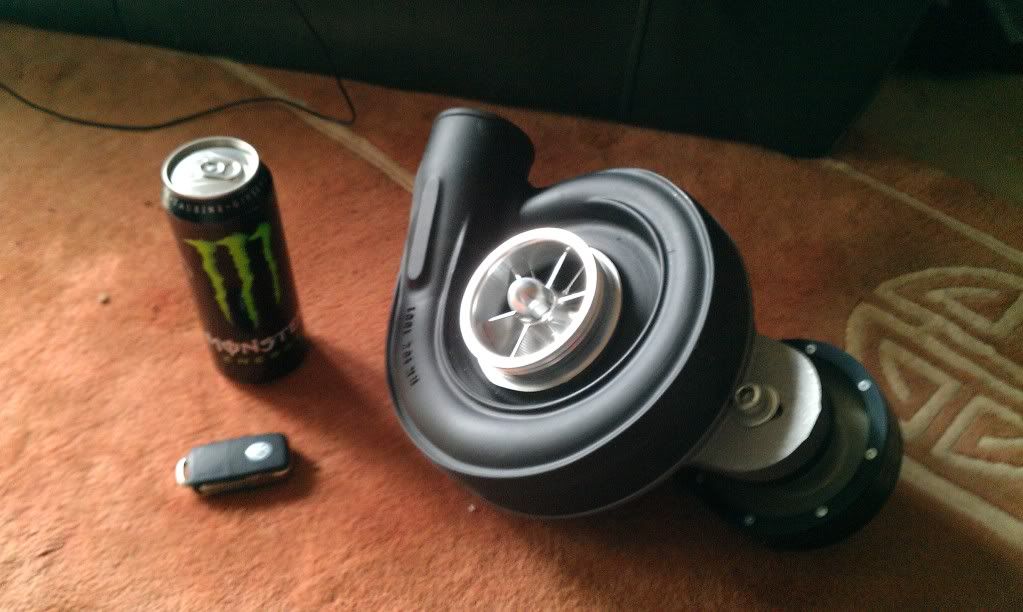
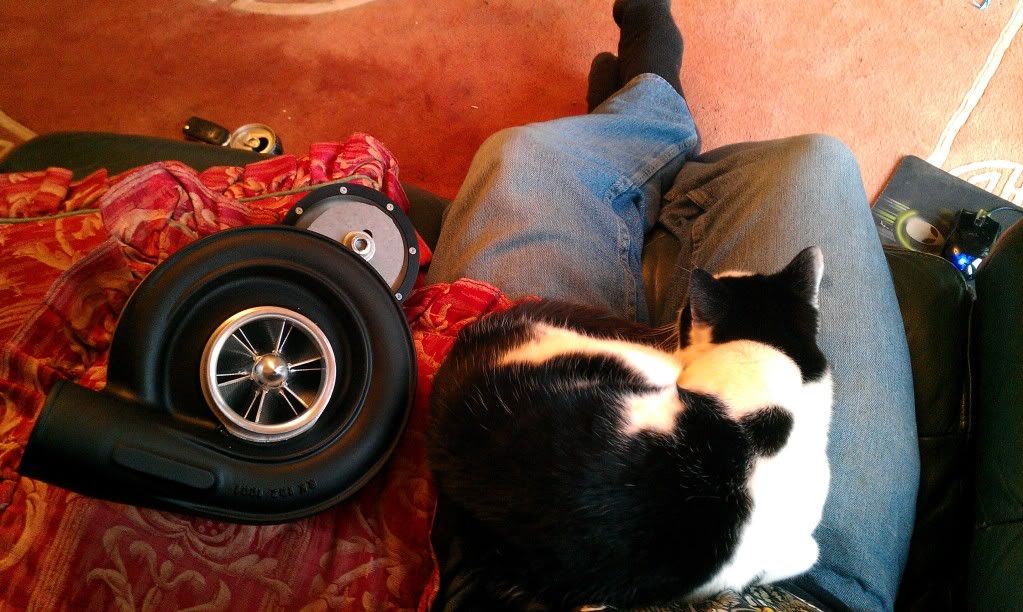
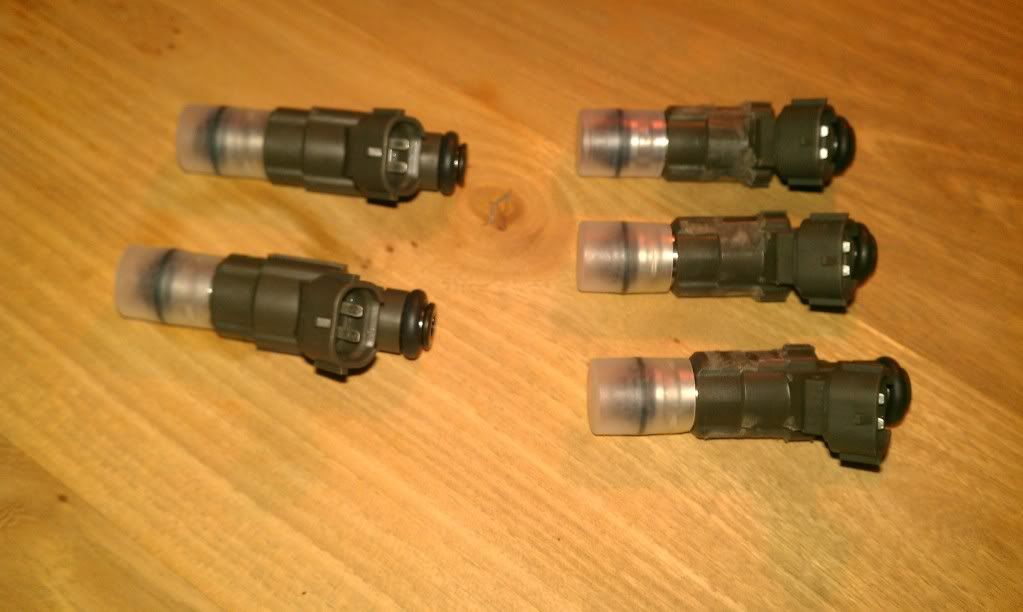
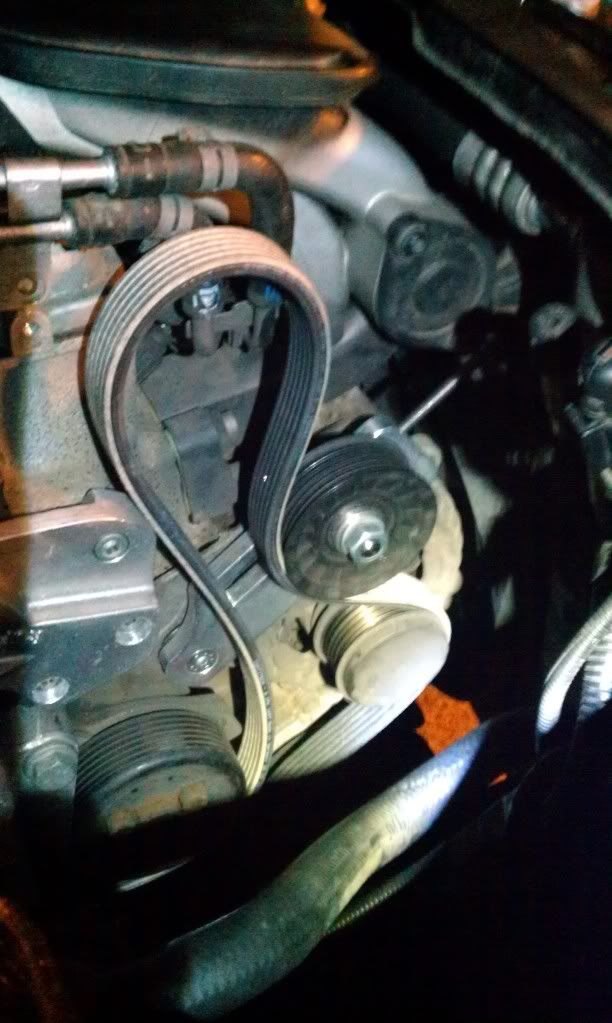
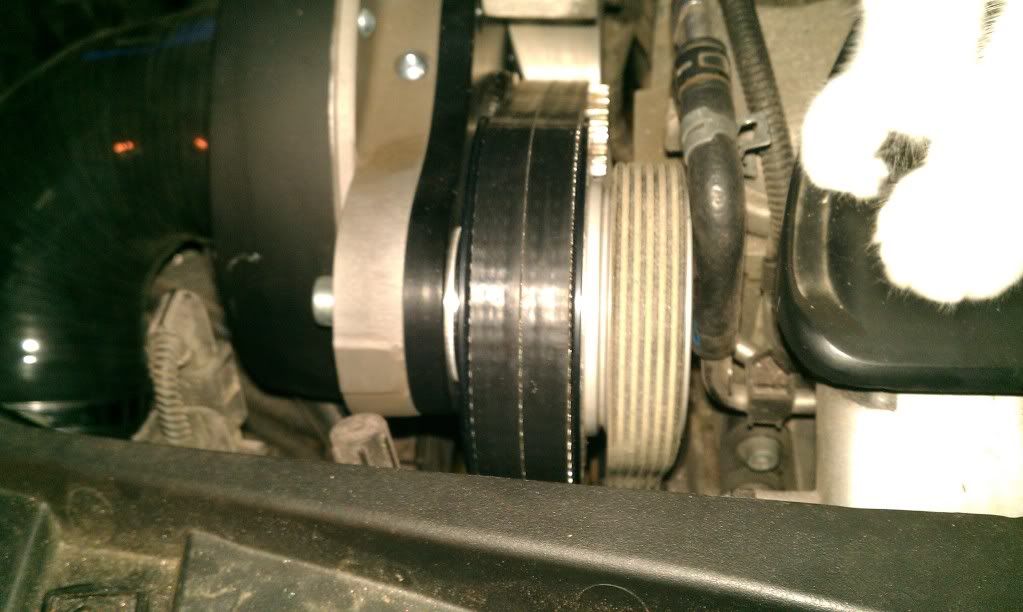
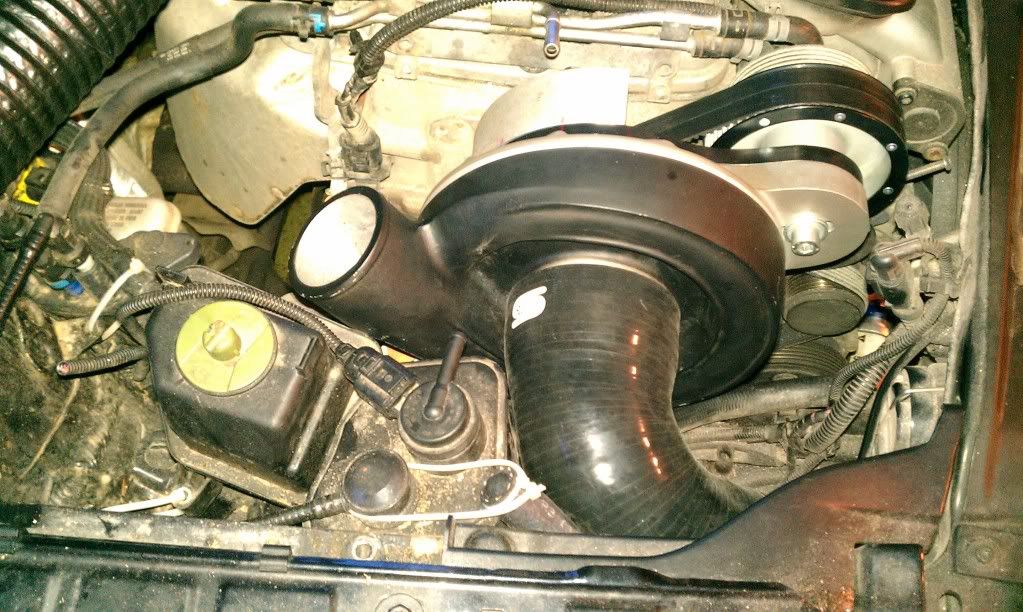
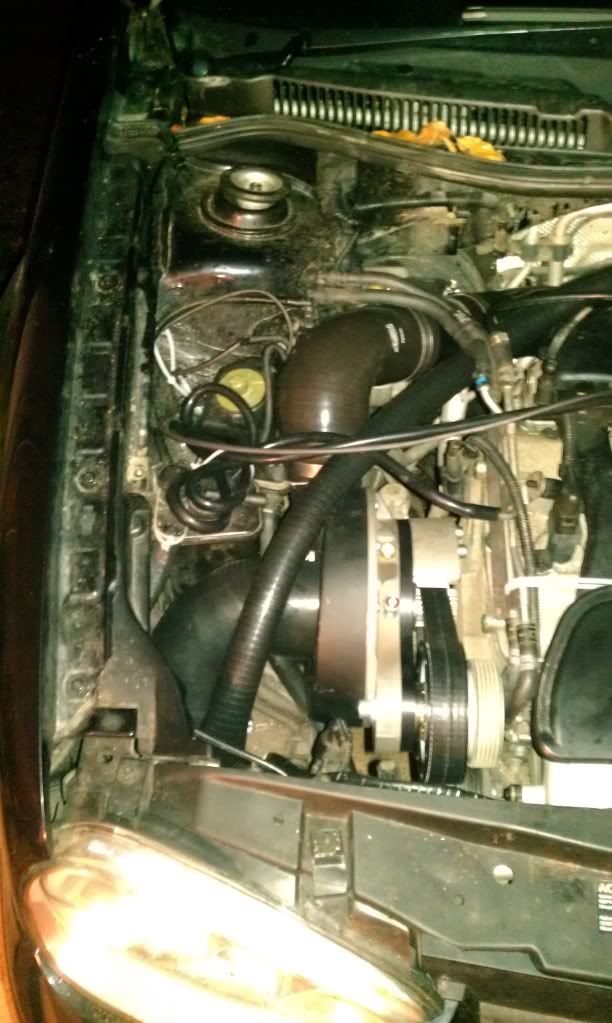
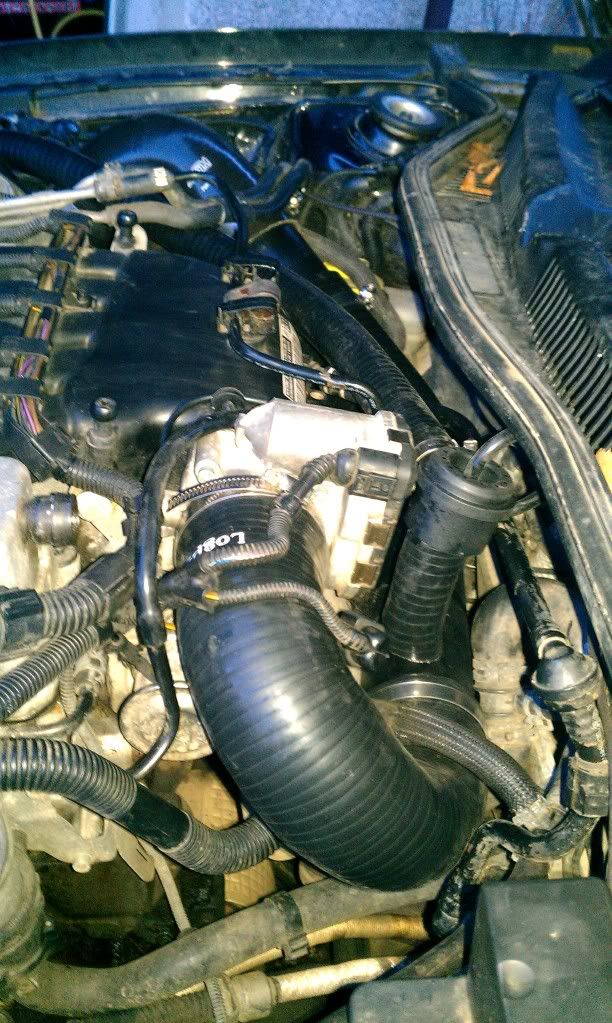
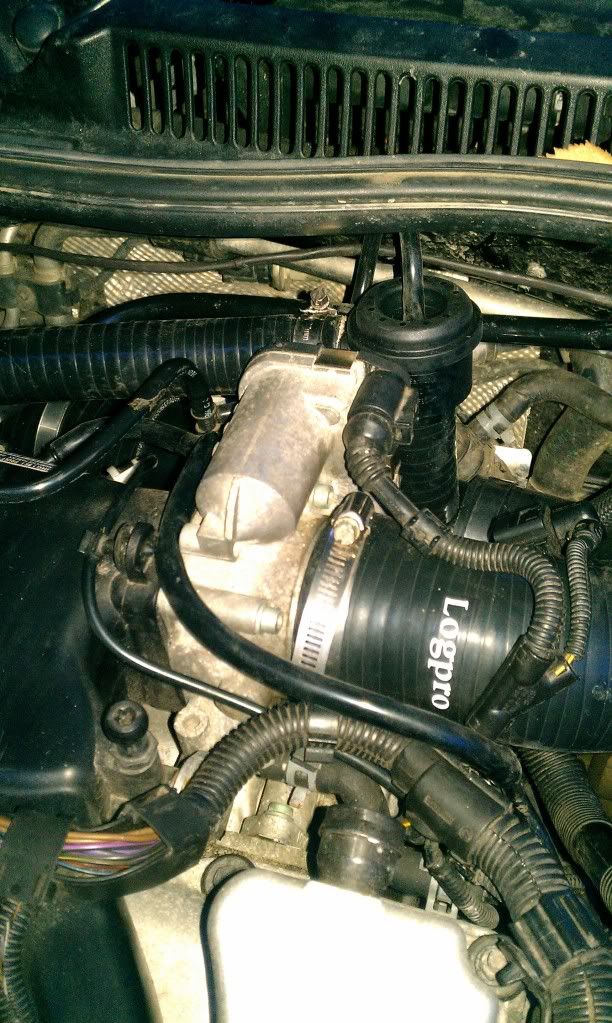
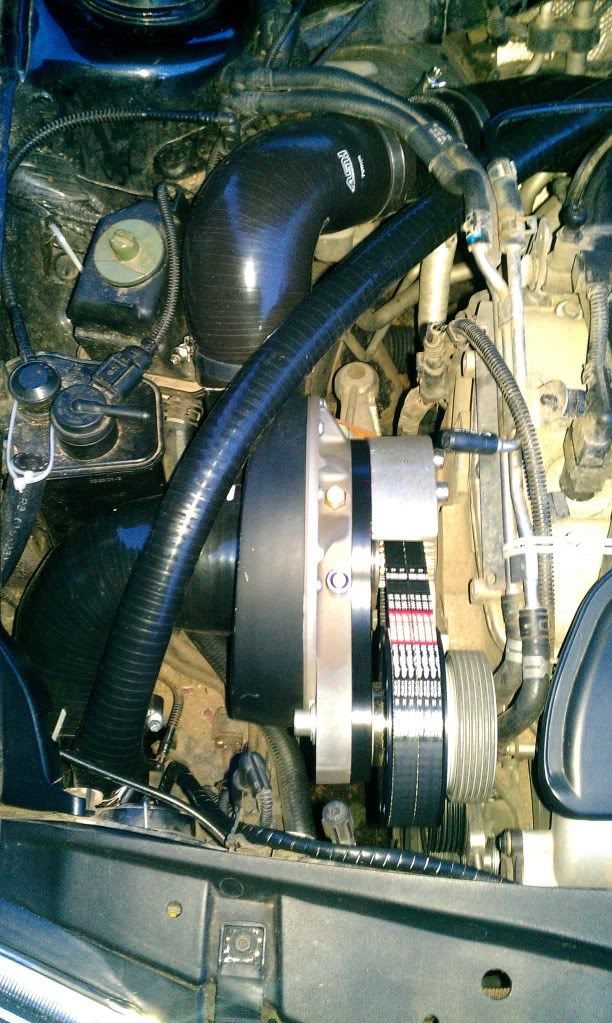
anyway, here's some pics of the kit.

inzor- Posts : 63
Join date : 2014-02-17
Re: inzors charged V5. stripped for re-build and forging
![]() by inzor Wed Feb 19, 2014 7:40 pm
by inzor Wed Feb 19, 2014 7:40 pm
started off with this off ebay.
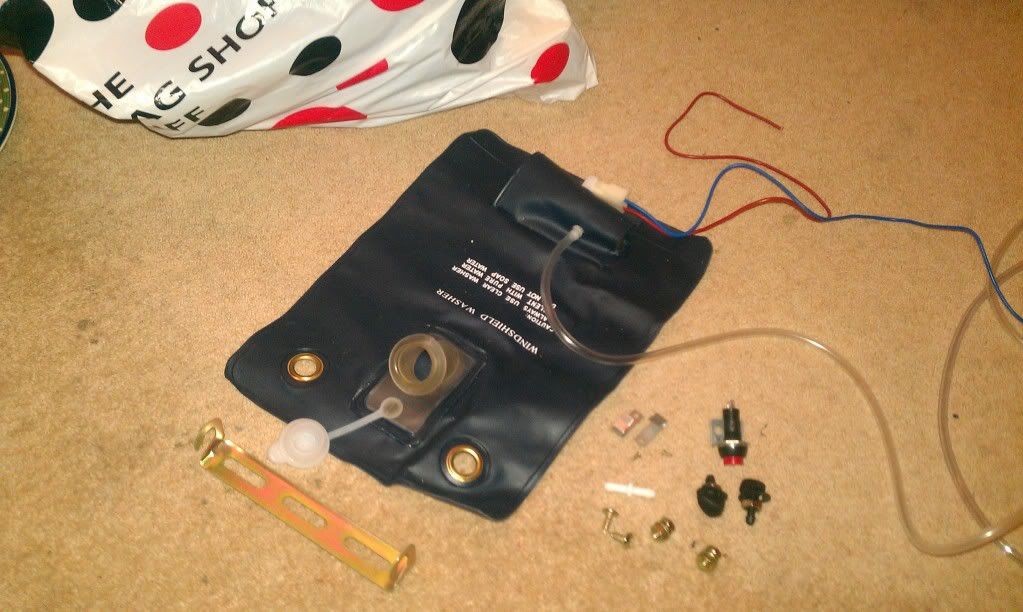
removed the old one from the bay, just 2 plastic nuts to take off, the washer tubing and the plugs for the low level sensor and the pump.
then plugged the front washer tube into the new bag, and cut off the plug from the original wiring. twisted the wires together and left it like this for a couple of days.
then i drilled 2 holes in the chasis behind the wing and bolted the bracket to it. no pics of this as i really struggled to do it. would be better removing the wing. got it wrestled into the hole and hung on the bracket then tidied up the wiring a bit.
un-twisted the bodge wire joining and fitted a tiyama connector and plugged them together. then wrapped it all up with 10mm cable tidy.

then i forgot to take anymore pics.
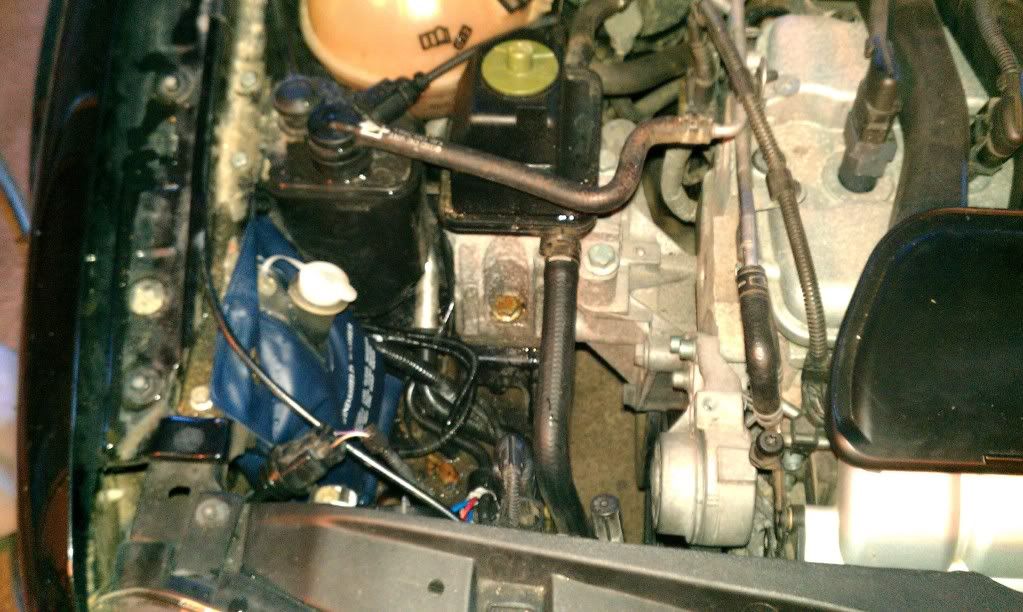
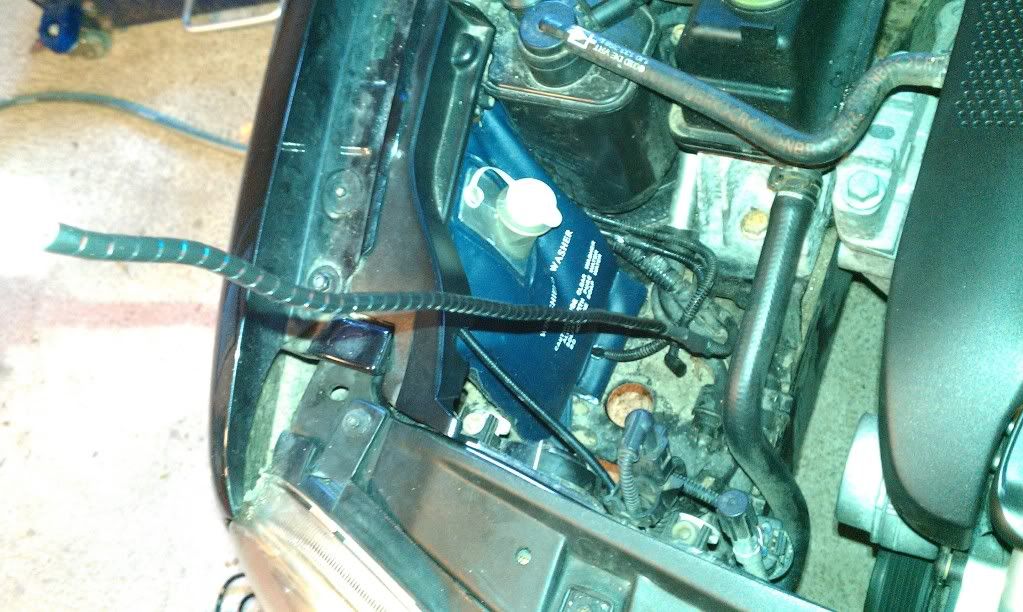
the washer bag was out of reach to fill, so i bought 500mm of 16x23mm (IDxOD) rad piping and it pushed into the top of the bag perfectly. now all you can see is the end of the rad pipe next to the headlight. looks alright.
the injectors do need some cutting/grinding to fit, so away to do that now.
inzor- Posts : 63
Join date : 2014-02-17
Re: inzors charged V5. stripped for re-build and forging
![]() by inzor Wed Feb 19, 2014 7:41 pm
by inzor Wed Feb 19, 2014 7:41 pm
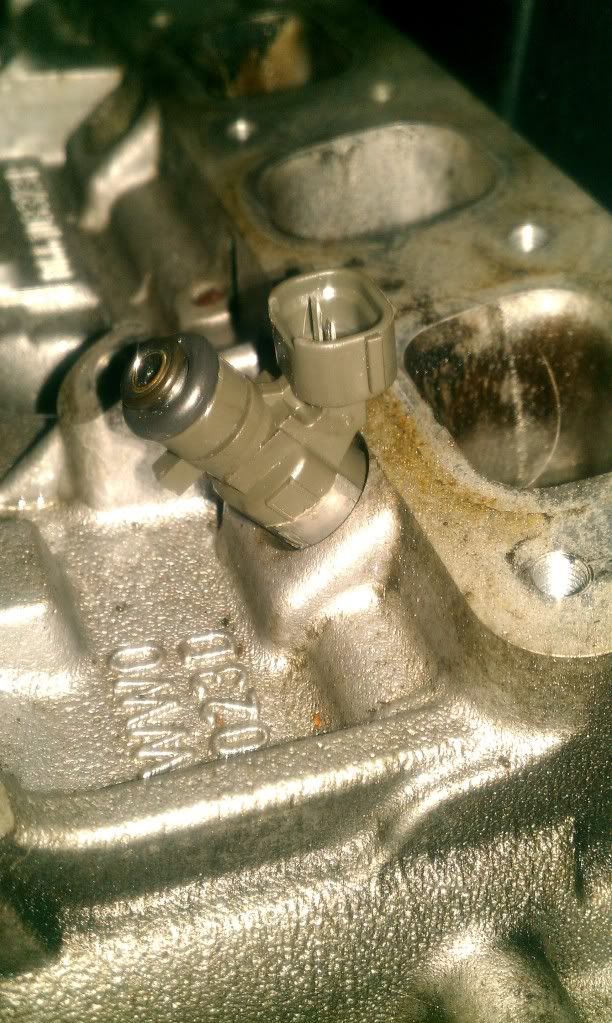
tried one in the spare head ive got lying about. pops in perfect.
inzor- Posts : 63
Join date : 2014-02-17
Re: inzors charged V5. stripped for re-build and forging
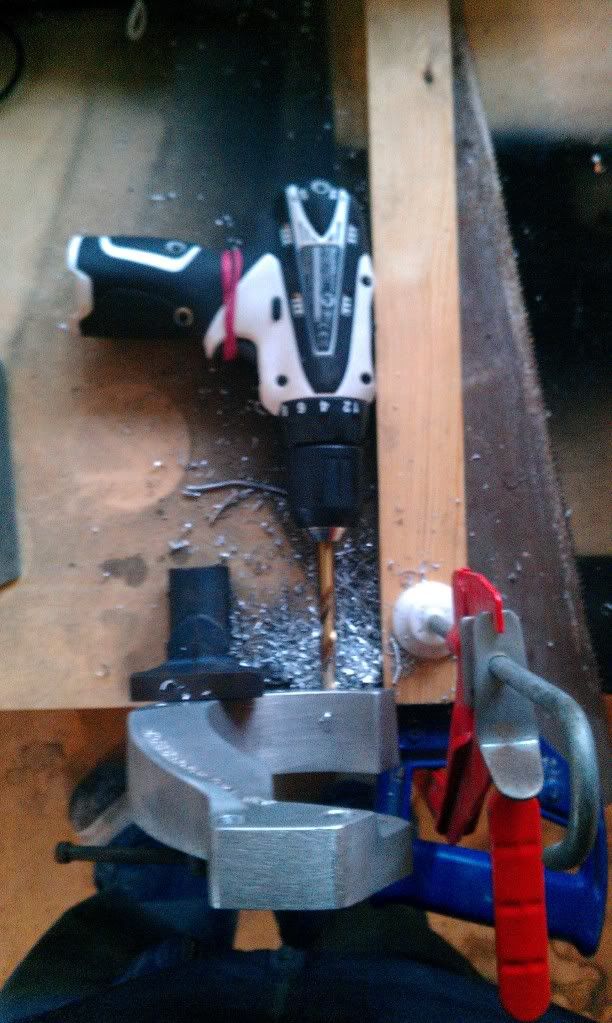
![]() by inzor Wed Feb 19, 2014 7:42 pm
by inzor Wed Feb 19, 2014 7:42 pm
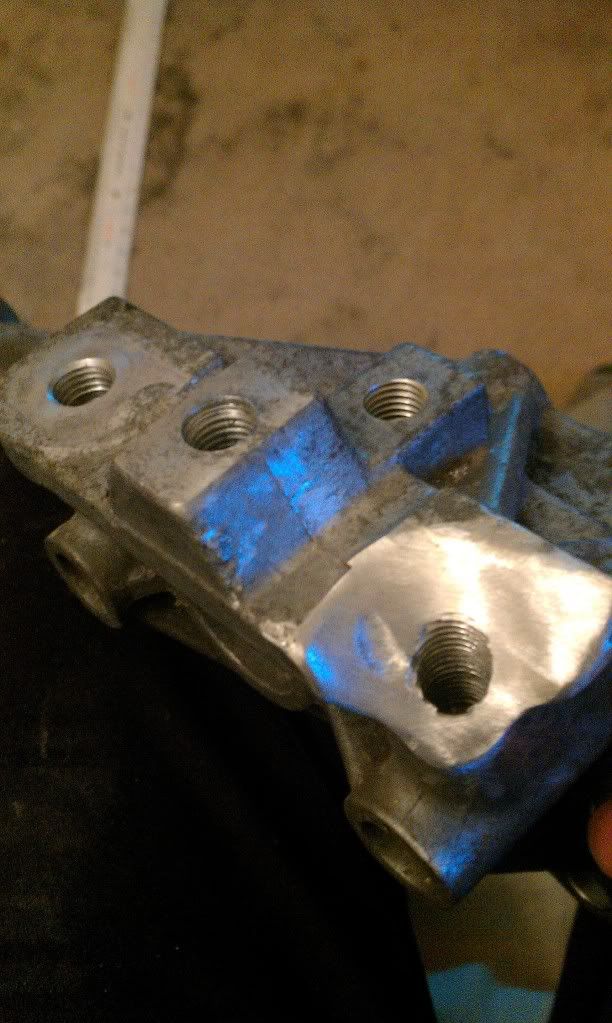
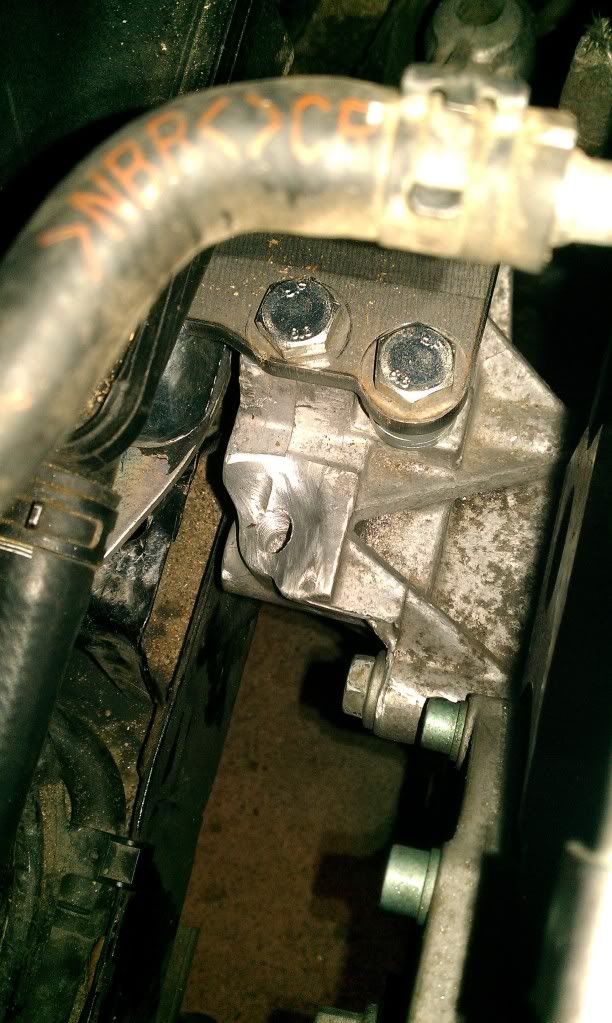
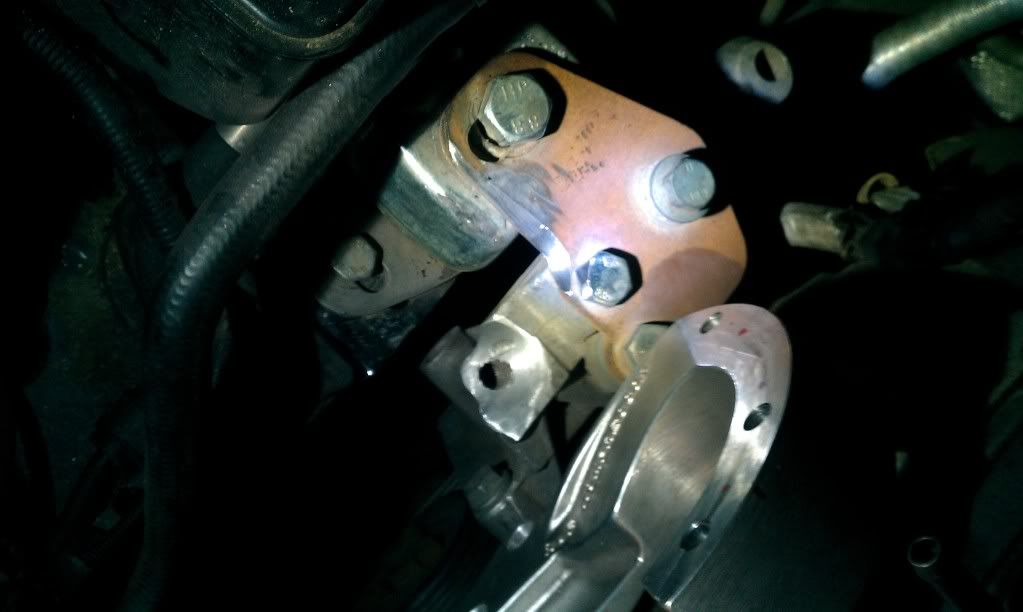
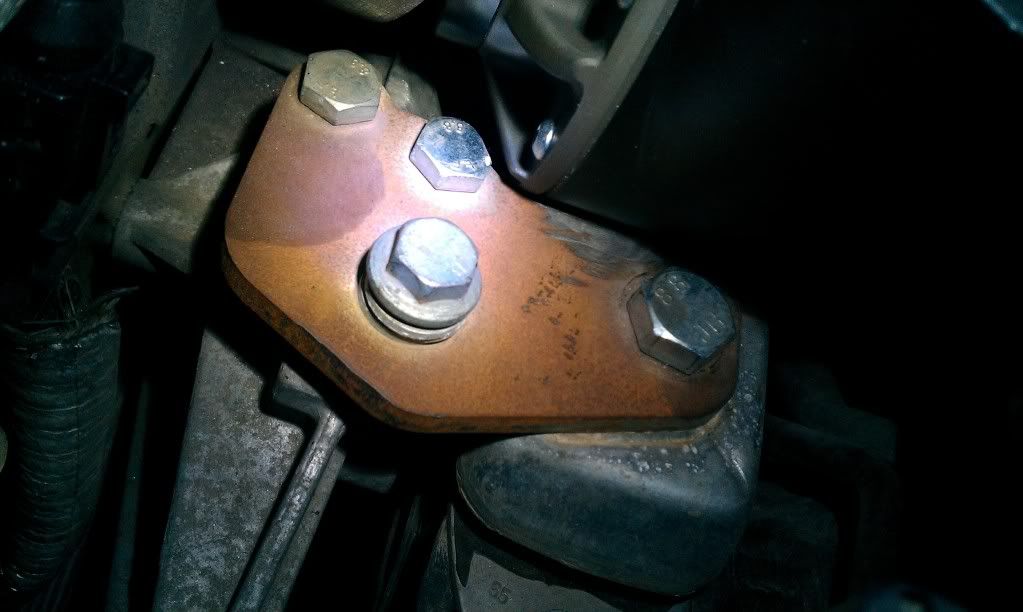
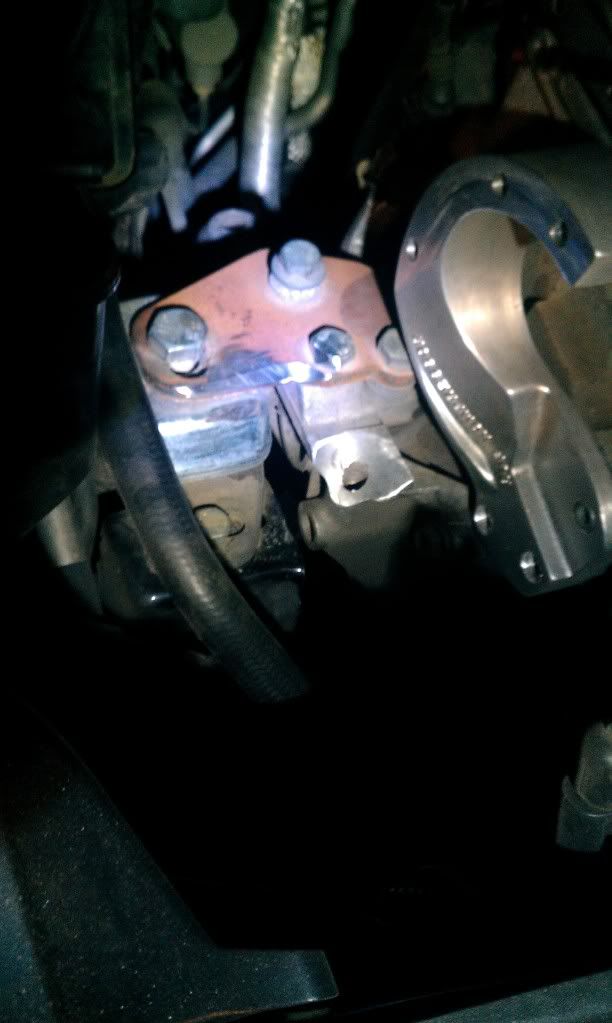
out with the old
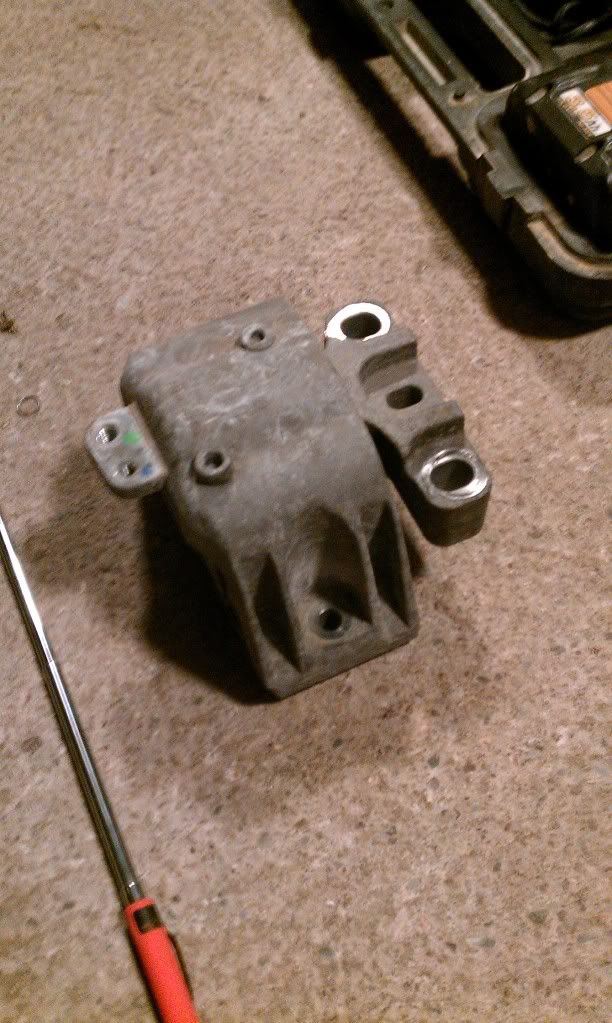
engine side mount grinded down for clearance and new holes tapped
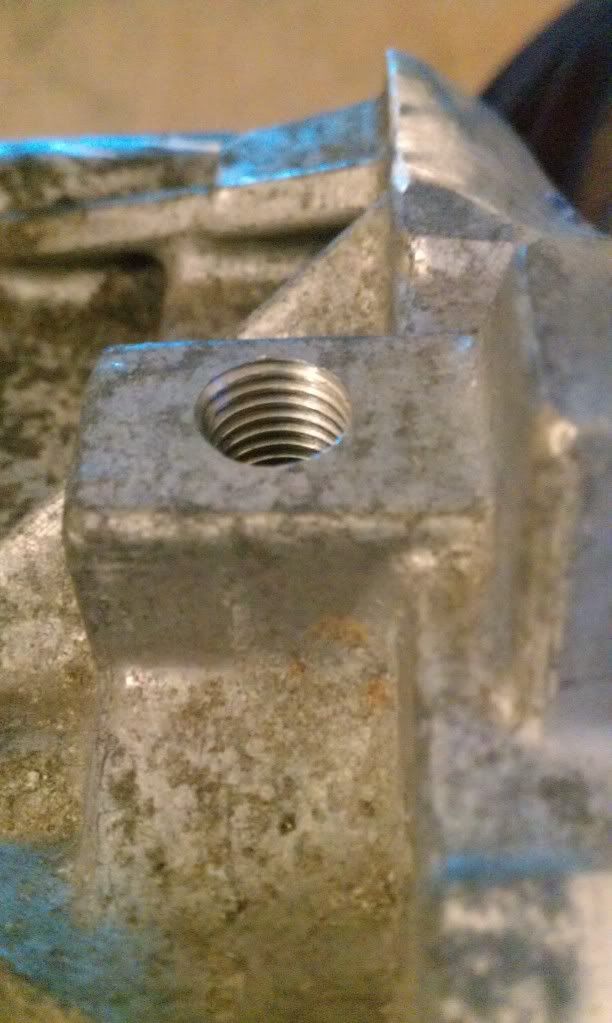
new mount in, so much smaller.
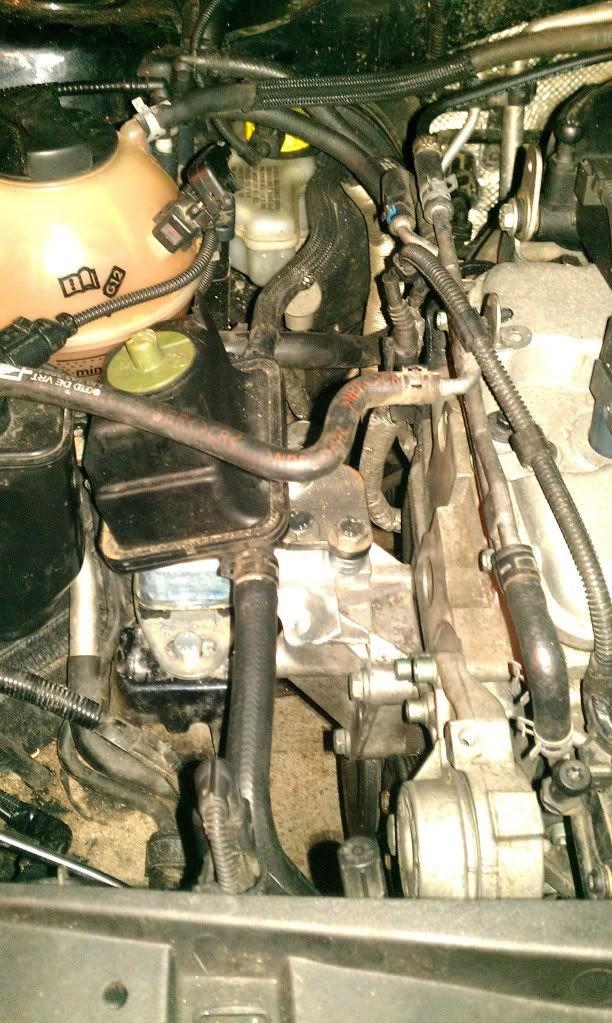
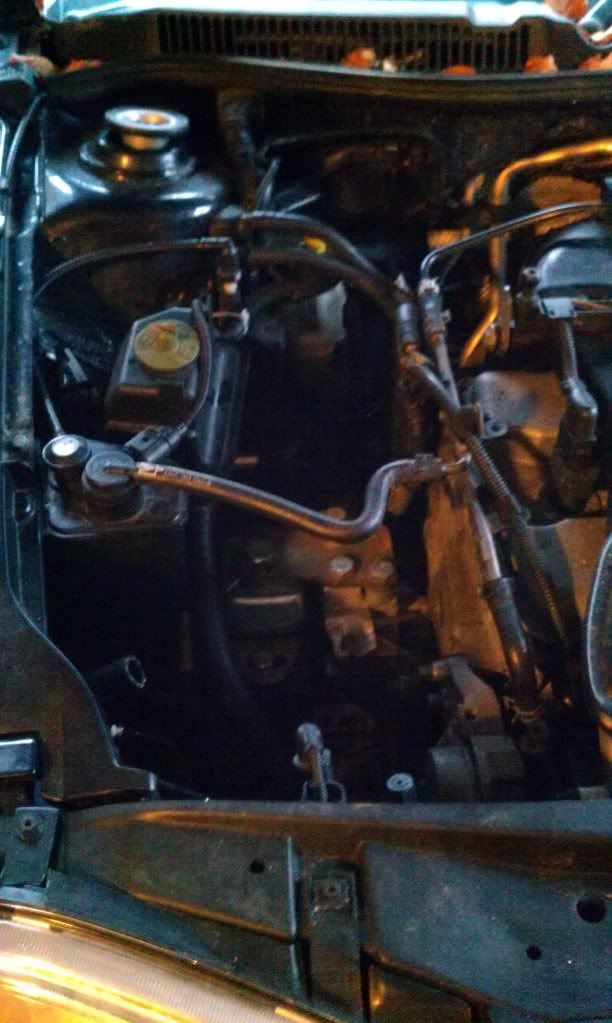
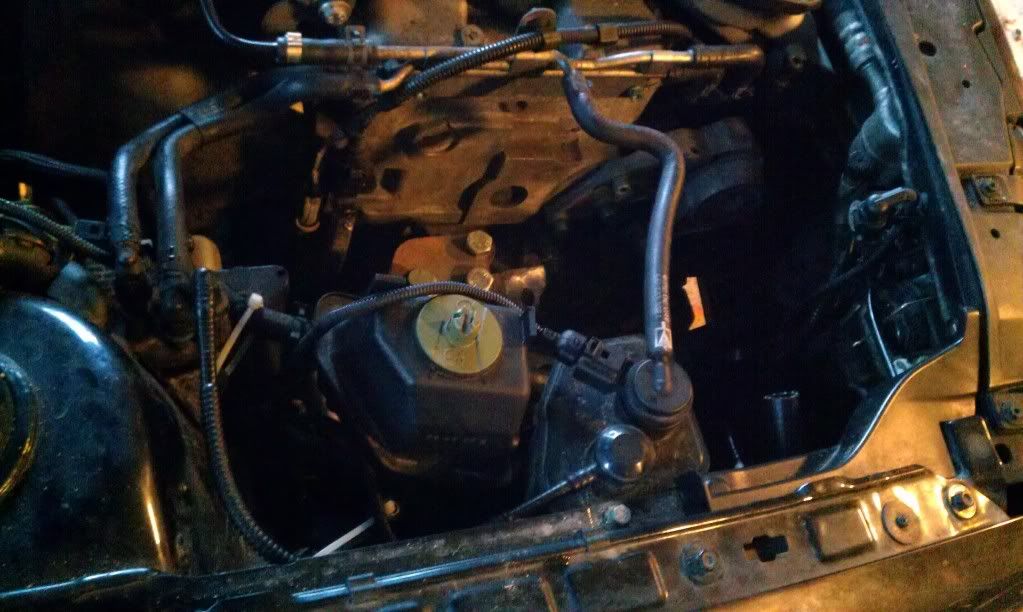
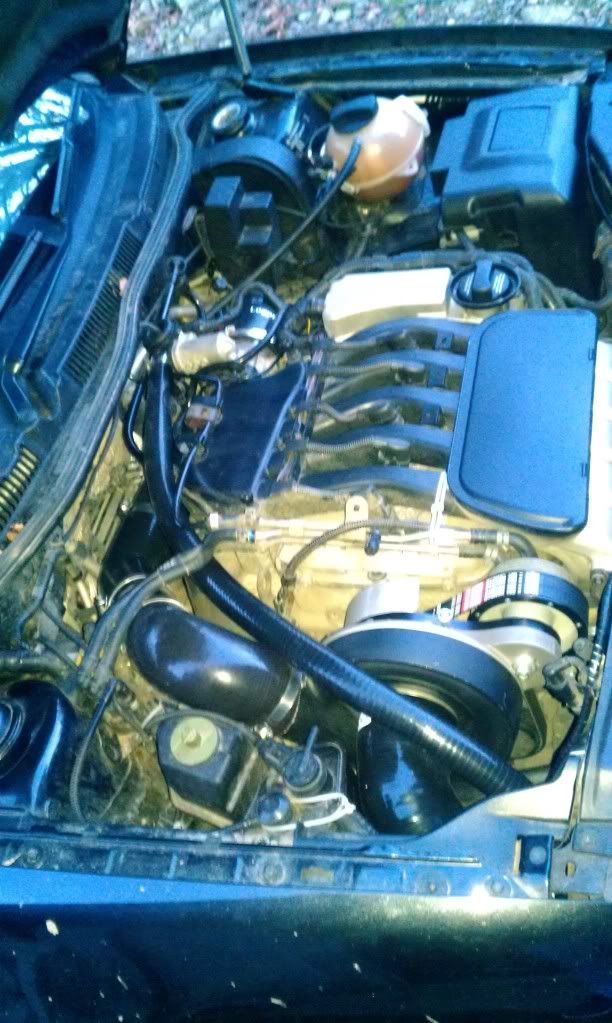
coolant bottle is next, should be a case of drain some coolant out, take off the bottle, pull the hoses to the other side of the bay and plumb it back in where the air filter should be. might just need an extra bit of hose.
inzor- Posts : 63
Join date : 2014-02-17
Re: inzors charged V5. stripped for re-build and forging
![]() by inzor Wed Feb 19, 2014 7:45 pm
by inzor Wed Feb 19, 2014 7:45 pm
it was a pretty easy job, some of the coolant pipes where pretty tight, especially the ones connecting to the metal pipe behind the engine and most of the clamps were facing downward so was hard to get the mole grips on, got there in the end.
started by unscrewing the coolant bottle and sucking the coolant out of it with one of those pumps. then put some cloth below the bottle and pulled the pipes off it. washed the bottle a bit and set it aside to dry.
then i followed the large coolant pipe till it reached a T-junction and removed it there. then loosened the junction and turned it to face the air filter.
removed the engine cover and pulled the 8mm pipe through its orange looking loop holding it to the manifold and removed it where it met another pipe. replaced with a new pipe that was straight to make things look neat.
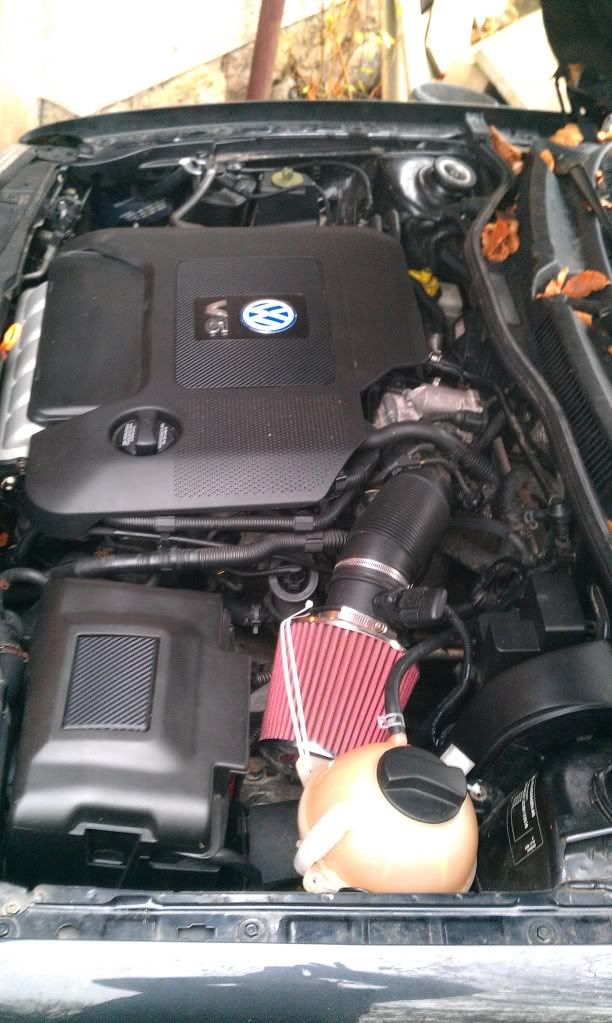
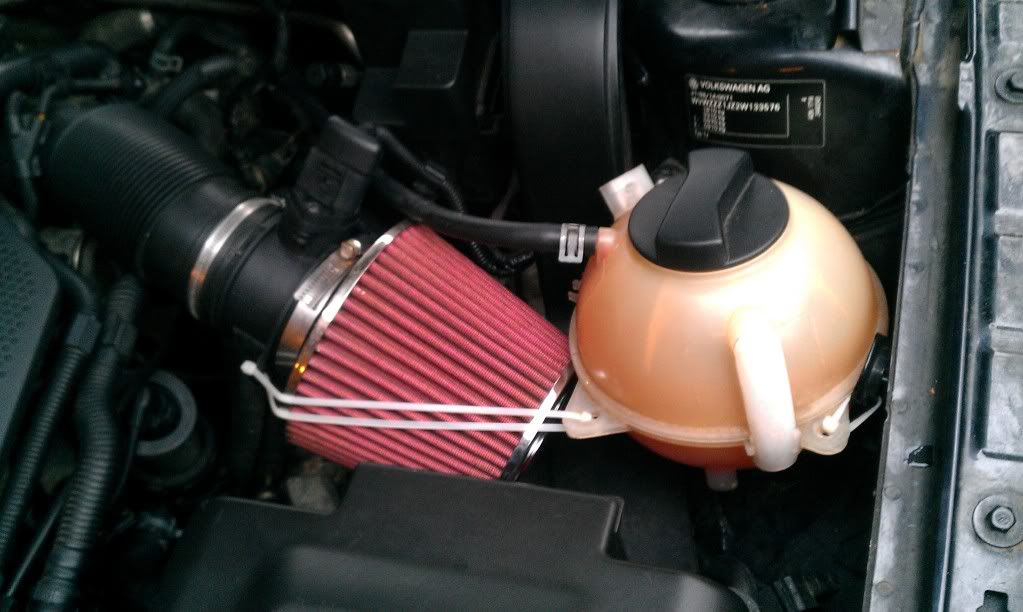
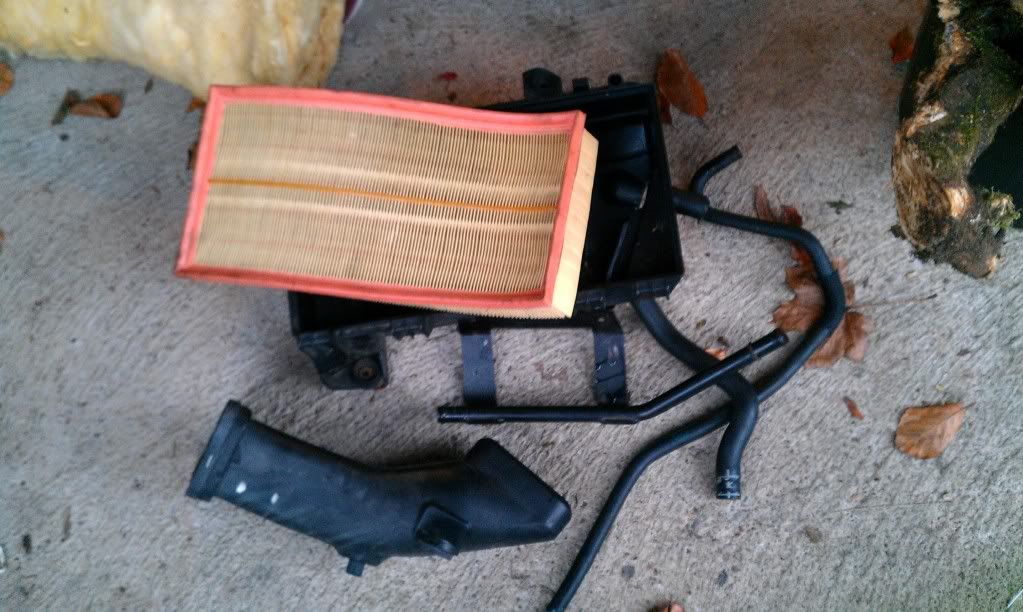
throw away the air filter box and dsg intake pipe to make room for the cone and coolant bottle.
slide the 8mm and 12mm pipes onto the coolant bottle and cable tie it in place. fit the cone filter and cable tie it so it doesnt bounce about and rub on things.
back at the other side of the bay i cable tied a few things to make more room.
done. no pics during the work but ive got a few after:
rooom!

spares:
inzor- Posts : 63
Join date : 2014-02-17
Re: inzors charged V5. stripped for re-build and forging
![]() by inzor Wed Feb 19, 2014 7:47 pm
by inzor Wed Feb 19, 2014 7:47 pm
holes marked


inzor- Posts : 63
Join date : 2014-02-17
Re: inzors charged V5. stripped for re-build and forging
![]() by inzor Wed Feb 19, 2014 7:49 pm
by inzor Wed Feb 19, 2014 7:49 pm
Finished. It was dark so just quickly pushed on vacuum pipes anywere to get it working.

Then today I tidied it up a little.

inzor- Posts : 63
Join date : 2014-02-17
Re: inzors charged V5. stripped for re-build and forging
![]() by inzor Mon Feb 24, 2014 5:41 pm
by inzor Mon Feb 24, 2014 5:41 pm

the corners flip up to reveal the quick release terminals. the slots the cable comes out of the box could do with deepening as they cause the cable to sit at an angle down to the terminals.
toying with the idea of puting 90 degree plastic edging on the corners of the box to cover up the joints in the carpet but it looks neat enough for now.
next job will be to shorten the battery cables a bit and try and have them bent in a way that looks a bit neater.
got a couple of coats on the 4mo splitter but no pics taken.
inzor- Posts : 63
Join date : 2014-02-17
Re: inzors charged V5. stripped for re-build and forging
![]() by welshv5er Mon Feb 24, 2014 6:47 pm
by welshv5er Mon Feb 24, 2014 6:47 pm

welshv5er- Posts : 39
Join date : 2014-02-23
Age : 53
Location : North Wales
Re: inzors charged V5. stripped for re-build and forging
![]() by R444SPY Mon Feb 24, 2014 11:39 pm
by R444SPY Mon Feb 24, 2014 11:39 pm

R444SPY- Posts : 170
Join date : 2014-02-06
Age : 51
Location : Hertfordshire
Re: inzors charged V5. stripped for re-build and forging
![]() by inzor Wed Feb 26, 2014 6:10 pm
by inzor Wed Feb 26, 2014 6:10 pm
i've seen a pic of the cooler fitted on top of the battery but im not sure how it was done, maybe remove the tray and sit the battery down on the chassis?
moving to the boot helps the weight distribution a bit. its a bit nose heavy with the charger, extra rad, cooler and extra water up front.
inzor- Posts : 63
Join date : 2014-02-17
Re: inzors charged V5. stripped for re-build and forging
![]() by R444SPY Thu Feb 27, 2014 12:56 pm
by R444SPY Thu Feb 27, 2014 12:56 pm
R444SPY- Posts : 170
Join date : 2014-02-06
Age : 51
Location : Hertfordshire
Re: inzors charged V5. stripped for re-build and forging
![]() by inzor Thu Feb 27, 2014 8:16 pm
by inzor Thu Feb 27, 2014 8:16 pm
thats why i havent got one yet. plan to get one as soon as the garage get back to me with an estimate. its been a few weeks since i heard from them though...
battery and the washer fluid tank can go in the boot. there's a guy over on uk-mkivs thats planning to fit the charger at some point and is doing all the bay prep just now, he's got his washer fluid in the boot. he's got a bora though so different boot shape.
the front end being heavy will give understeer in the lower speed corners and the back stepping out a bit in fast corners if there's no weight on the rear wheels. i got the back end out at knockhill when i had the back seats and spare stripped out. i quite liked it
inzor- Posts : 63
Join date : 2014-02-17
Re: inzors charged V5. stripped for re-build and forging
![]() by inzor Fri Feb 28, 2014 10:22 pm
by inzor Fri Feb 28, 2014 10:22 pm


inzor- Posts : 63
Join date : 2014-02-17
Re: inzors charged V5. stripped for re-build and forging
![]() by inzor Sun Mar 02, 2014 8:21 pm
by inzor Sun Mar 02, 2014 8:21 pm


click the pictures to open the video. turn up the volume.
inzor- Posts : 63
Join date : 2014-02-17
Re: inzors charged V5. stripped for re-build and forging
![]() by R444SPY Sun Mar 02, 2014 10:59 pm
by R444SPY Sun Mar 02, 2014 10:59 pm
R444SPY- Posts : 170
Join date : 2014-02-06
Age : 51
Location : Hertfordshire
Re: inzors charged V5. stripped for re-build and forging
![]() by inzor Sun Mar 02, 2014 11:12 pm
by inzor Sun Mar 02, 2014 11:12 pm
hope to get it done soon but things are moving quite slowly just now.
inzor- Posts : 63
Join date : 2014-02-17
Re: inzors charged V5. stripped for re-build and forging
![]() by welshv5er Mon Mar 03, 2014 8:45 pm
by welshv5er Mon Mar 03, 2014 8:45 pm
welshv5er- Posts : 39
Join date : 2014-02-23
Age : 53
Location : North Wales
Re: inzors charged V5. stripped for re-build and forging
![]() by inzor Mon Mar 03, 2014 9:10 pm
by inzor Mon Mar 03, 2014 9:10 pm
hope to get the 4mo splitter finished this week, its got a couple of coats on it to show up the areas that need sanding/more filler primer.
thats tomorrows job.
inzor- Posts : 63
Join date : 2014-02-17
Re: inzors charged V5. stripped for re-build and forging
![]() by R444SPY Tue Mar 04, 2014 12:04 am
by R444SPY Tue Mar 04, 2014 12:04 am
R444SPY- Posts : 170
Join date : 2014-02-06
Age : 51
Location : Hertfordshire
Re: inzors charged V5. stripped for re-build and forging
![]() by inzor Tue Mar 04, 2014 6:23 pm
by inzor Tue Mar 04, 2014 6:23 pm
inzor- Posts : 63
Join date : 2014-02-17
Re: inzors charged V5. stripped for re-build and forging
![]() by inzor Sun Mar 09, 2014 9:07 pm
by inzor Sun Mar 09, 2014 9:07 pm

making progress, need some more high build filler primer though.
inzor- Posts : 63
Join date : 2014-02-17
Page 1 of 3 • 1, 2, 3 ![]()
golfv5.com :: General :: Members Rides


» sensor location
» HELLO FROM AUS
» Workshop manual advice
» Hi to fellow V5 drivers --- request for help
» Greetings from Finland
» Cold Air Intake Guide
» Cam position sensor code
» Location of Coolant Temperature Sensor??